Installation
How a heated driveway is put together.
Scroll or use the arrowsSwipe the drawing or tap the arrows to take a hydronic driveway apart, from the soil up, and see what each layer does.
Part 1: Native subgrade
The soil under the driveway, dug out to depth and compacted. Everything above depends on this ground staying put, so it has to be firm before any stone goes down.
Typical compaction for soil: 96 to 98 percent.
Source: Uponor snow and ice melting manual
Part 2: Granular A base
Dense graded aggregate, the material Ontario road specs call Granular A, spread and compacted. It gives the slab a solid, level bed so the heating system does not shift or settle.
150 mm under a residential driveway in the City of Toronto standard.
Source: City of Toronto T-310.050-8 and TS 1010 (OPSS.MUNI 1010); Uponor manual
Part 3: Rigid insulation
High density foam board rated to carry the weight above it, laid over the base where the design calls for it. It sends the heat up to the snow instead of down into the ground, and the system responds faster.
Typical: 2 in (about 50 mm) board, about R-10, often run down the edges as well.
Source: Uponor manual; SunFlow, Retrofitting vs. New Construction
Part 4: Reinforcing mesh
Welded wire mesh or rebar laid over the insulation. The tubing is tied to it, which holds each run at the right depth and stops it floating up while the concrete is poured.
Ties about every 3 ft along straight runs, with extra ties at each bend.
Source: Uponor manual
Part 5: PEX tubing
Oxygen barrier PEX tubing laid in a serpentine pattern. A warm mix of water and propylene glycol runs through it and heats the slab from the inside.
Typical spacing 6 to 12 in (about 150 to 300 mm), up to 12 in for a home driveway. SunFlow sets the spacing from BTU calculations for the local climate.
Source: Uponor manual; SunFlow, The Science of Snow Melting
Part 6: Manifold
Every loop starts and ends here. It shares the warm fluid between the loops so the far corner of the driveway gets the same heat as the end by the house.
Before the pour, the loops are pressure tested, typically to at least 60 psi for 24 hours.
Source: Uponor manual; SunFlow, The Science of Snow Melting
Part 7: Concrete pour
Concrete is poured over the mesh and tubing and sets around them. It holds heat well and radiates it up to the surface.
At least 1.5 in (about 38 mm) of concrete over the tubing. A 150 mm slab for a residential driveway in the City of Toronto standard.
Source: Uponor manual; City of Toronto T-310.050-8; SunFlow, Before Installing
Part 8: Finished surface
The part you see and drive on. Concrete is finished in place with planned expansion joints, while asphalt and pavers go on over a compacted sand bed.
Sand bed over the tubing: typically 3 in under asphalt, 2 to 3 in under pavers. Shown here: brushed concrete.
Source: Uponor manual; SunFlow, Before Installing and Finish Options
Part 9: Snow sensors
A sensor beside the driveway watches for falling moisture below freezing, and one set into the slab reads the surface temperature. The system runs only when both agree that snow is coming or already there.
The slab sensor goes where the surface drains and warms like the rest of the driveway.
Source: SunFlow, The Science of Snow Melting; Infloor snowmelt guide
Part 10: Boiler and controller
A dedicated high efficiency boiler in the mechanical room heats the water and glycol. The controller reads both sensors and decides when it runs.
Fluid going to a concrete slab is kept at or below 150°F (about 65°C).
Source: SunFlow, The Science of Snow Melting; Uponor manual
Put back together
It melts its own snow.
The controller holds the slab slightly above freezing. Snow that lands turns to water, and the warm surface dries.
Dimensions shown are typical published figures. SunFlow engineers the real ones for each property.
The project
Four stages, one project manager.
Consultation
SunFlow starts by learning about the property, how you use it and what you want from it. Most consultations take less than 45 minutes, with no obligation.
Design
Your system is engineered for your property: grading, materials, drainage, landscape design and daily use. Tube spacing comes from BTU calculations for your local climate.
Installation
On a new build or full replacement, the tubing goes in before the surface is poured or laid. On an existing driveway, it goes into saw-cut grooves, or under lifted and reset pavers. Your project manager oversees every stage.
Commissioning and handover
Before winter, every component is tested, calibrated and adjusted, up to a final pressure test. You receive the documentation for your system.
The build, stage by stage
Base, insulation, tubing, then the surface: concrete, pavers or asphalt.
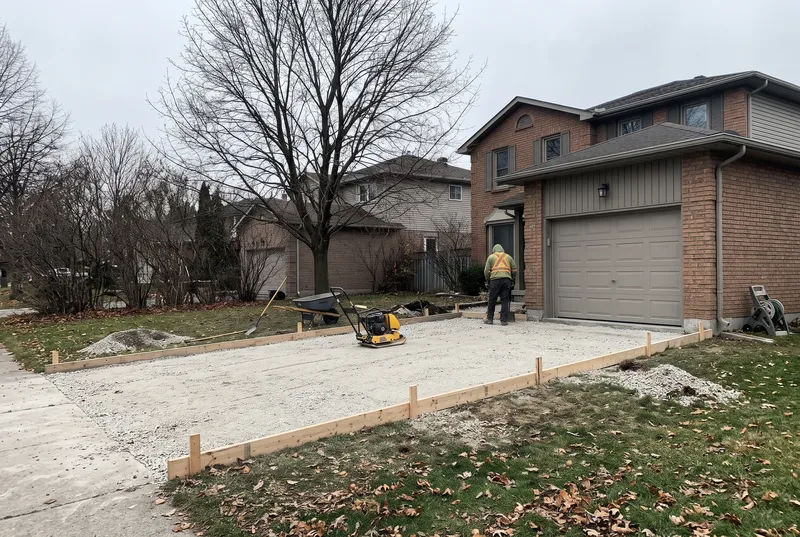
Compacted gravel base with forms set
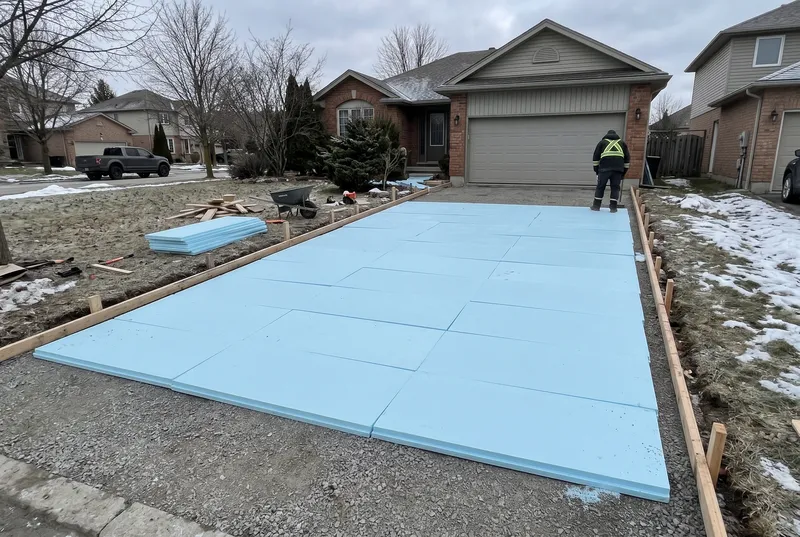
Foam insulation boards laid over the base
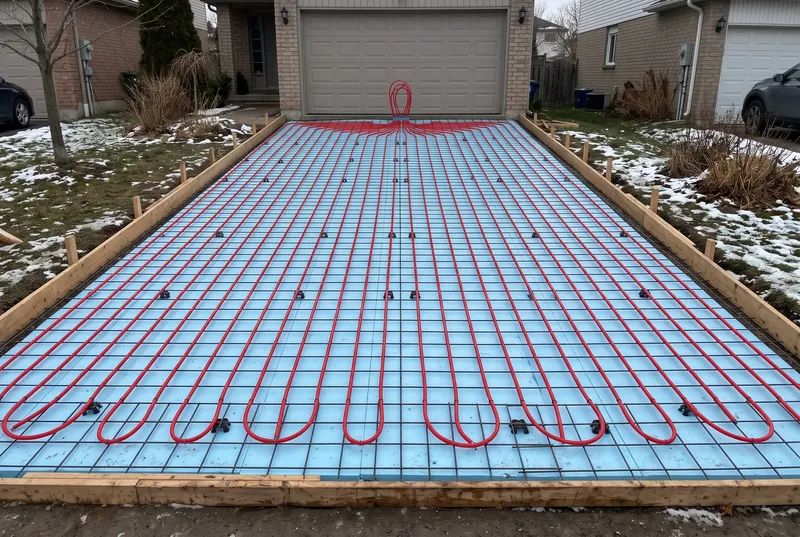
PEX tubing on reinforcing mesh before the pour
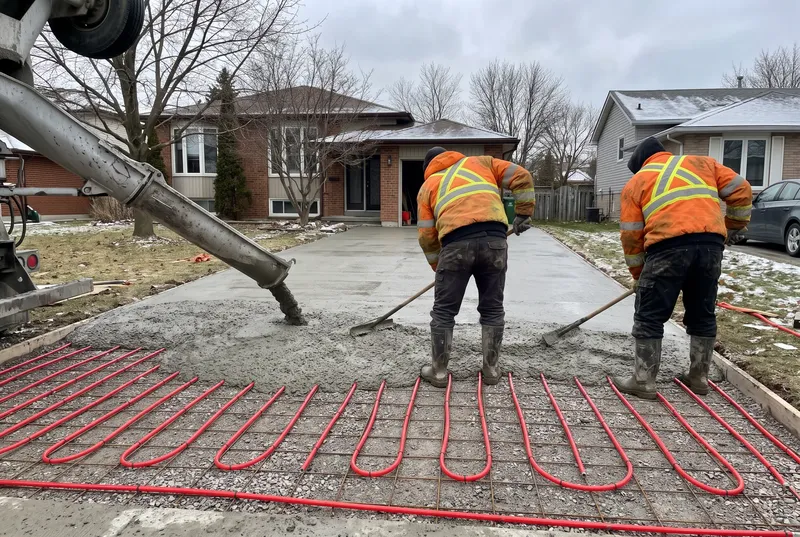
Concrete going down over the heating tubing
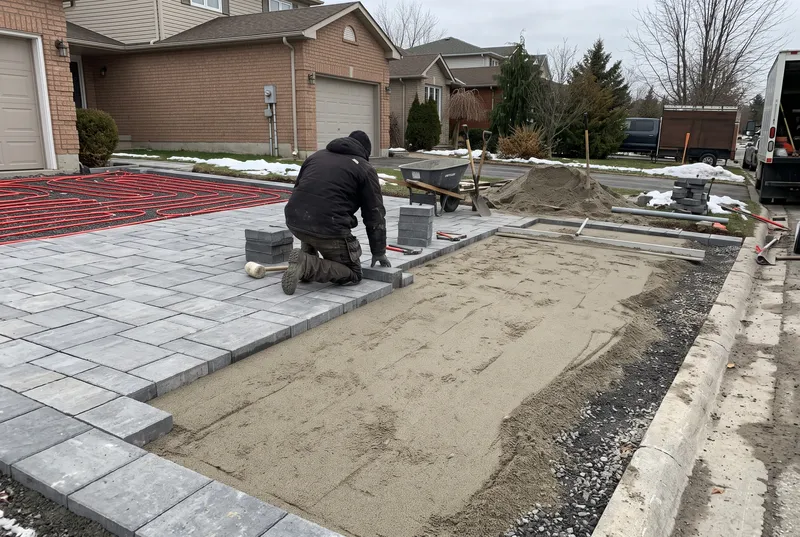
Pavers going down over the sand bed and heating tubing
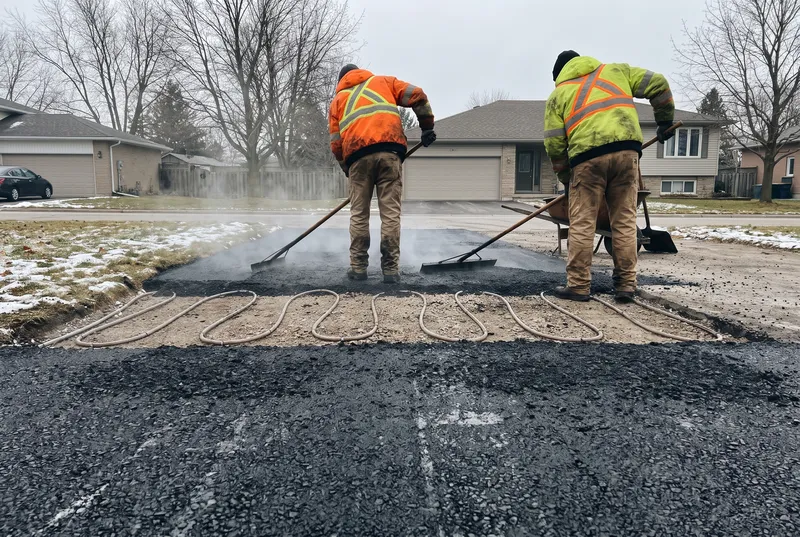
Hot asphalt spread over the heated base
Timing
Start early. The tubing goes in before the surface.
The best time to plan a heated driveway is while your home is being designed, or at least 3 months before you pave. That leaves time for utility planning and the boiler room setup.
- Lead timeAsk SunFlow how far ahead installs are booking this season.
- Install durationSunFlow gives you the days on site for your driveway with your quote.
- WarrantyAsk SunFlow what is covered, for how long, and by whom.
Before you call
What helps SunFlow help you.
You do not need every detail settled to start. These make the first conversation more useful:
- LocationThe property's town or address.
- StageEarly concept, design, permits, under construction, or an existing home.
- SizeApproximate dimensions of the area to heat.
- SurfaceThe material you have or plan to use.
- TimingWhen you expect the driveway work to happen.
- DrawingsSite plans or drawings, if you have them.
Where the figures come from
The layer order and every dimension in the drawing come from these documents. Manufacturer figures are typical values; SunFlow engineers each system for its property.
- Uponor, Snow and Ice Melting Design and Installation Manual (4th ed., 2015)
- Infloor, Snowmelt Installation Guide (2015)
- City of Toronto standard drawing T-310.050-8, Driveway Thickness (Rev 3, Sep 2018)
- City of Toronto TS 1010 (Sep 2024), amendment to OPSS.MUNI 1010, aggregates for base and subbase
- SunFlow's own articles (on its previous website): The Science of Snow Melting, Everything You Need to Know Before Installing, Retrofitting vs. New Construction and Finish Options.
Next step
Start with a conversation about your property.
Most consultations take less than 45 minutes and come with no obligation. Bring rough driveway measurements and the surface you have in mind, and SunFlow takes it from there.